





In this tutorial

My notes from this video
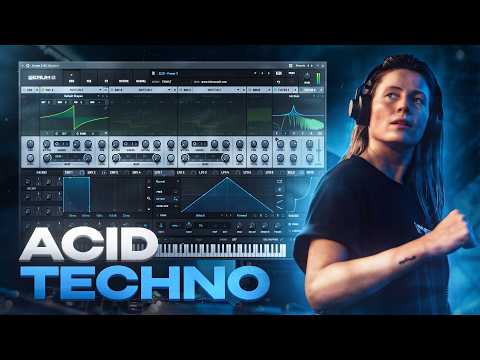
I take down all the voices so we only have one voice, and enable legato and gliding. Then I immediately open a filter, add resonance, take envelope 2 and add it to the cutoff. You don't want to open it too much, but you do want to add it a bit. After a filter, with acid you always add some sort of distortion. I like the hard clipper, all the way.
Then I use macro one to find the lowest point. That obviously doesn't sound like acid, but as you move towards the mids you start to hear the acid sound. Then I open the macro and take down the level until I find the highest possible acid sound. Now macro one plays through the cutoff from the lowest to the highest point.
Different filters have different sounds. This is an analog filter, but change it to a dirty filter and you notice slight differences between them. A really good one I can recommend is the low shelf diode, because it's very beefy and has a lot of low end. Per filter the lowest and highest point and the resonance settings change a little bit, so I readjust the levels.
With the blend it kind of rolls off the lows, so do that a bit. When you roll off the lows you give more room to the mids, which then get distorted more, and that's the acidic sound. Another trick to let the mids breathe more is the squeeze warp mode on a saw wave. It either makes it very hollow or boosts it and makes it more squary.
The velocity changes in the MIDI pattern go to the cutoff. I like adding the velocity to macro one more than right to the filter, because sometimes that gets too extreme. We already locked in the lowest and the highest point of our acid sound, so might as well use the velocity right within that range. Put it right on the filter and it kind of overshoots.
The downside is that at some point the velocity won't do anything anymore, because the range is squeezed out. I'm willing to make that trade off. In the matrix I make it way more drastic, so the low hits don't really change the cutoff too much, but the high hits really change the sound a lot.

People often think we only have one drive, and that's true. We can't really add another distortion, which is a shame. But you can use filters and the drive of them. I open filter 2, assign filter 1 in there and remove oscillator 2, so the saw wave goes in filter 1 and filter 1 goes in filter 2. I roll it into a high pass and remove the resonance, so I can control the lows that come out of filter 1.
When the lows are very high the mids get overshadowed and you don't really get your acid sound. So roll off the lows, change it to 24 dB if you like, and then increase the drive. Every filter has a different characteristic, so now you suddenly have a lot of tone control. Roll off frequencies, change the slopes, add drive and choose filter types. This really helps shape the acid sound.

If you want a very modern, blown up acid sound you can put a multiband compressor in front of your distortion or after. Before makes it very beefy. Afterwards is kind of cleaner but very squashed, because it gets distorted first and then multiband compressed.
I like using a single band instead, and adding a bit of attack to make it a bit more snappy. Increase the threshold and then add makeup gain. If you add it afterwards it also really pumps out all the wet effects, and I don't really like that too much.

FL Studio·Vital

Free Vital Acid Techno
Get this one free, plus hundreds of techno sounds, presets & project files. Unlock our freebie vault.
We only send you techno content. Unsubscribe anytime.
Open the Freebie Vault